[ad_1]

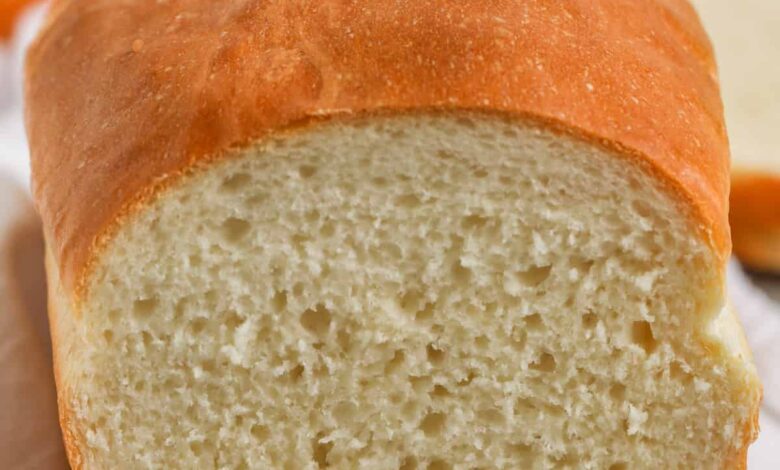
I can’t think of anything better than fresh homemade bread warm from the oven.
This white bread recipe is made with ingredients you likely have on hand! Below I will walk you through the step-by-step instructions for a perfect loaf.
It’s a go-to for perfectly fluffy slices that hold up well and turn every sandwich into a gourmet meal! This homemade bread can be enjoyed with butter and jam or as a classic grilled cheese. Make your favorite sandwiches or just slather it in butter.

Our Favorite Homemade Bread Recipe
- Every home cook will feel like a master baker with this basic white bread recipe because it’s easy to make.
- It needs only a few ingredients that are probably already in the pantry.
- Step-by-step instructions ensure perfect bread every time.
- This recipe makes 2 loaves (and they freeze well).
- This bread is flavorful, soft, and fluffy yet holds up well to sandwiches.

Ingredients in White Bread
There is a science to creating the perfect, fluffy loaf with a soft, tender crust. But there’s room for many variations in your bread baking journey!
All-Purpose Flour is used in this homemade bread recipe. It makes a perfect loaf and we love it because it’s something I always have on hand.
Active Dry Yeast is used in this recipe and it is mixed with sugar. A bit of sugar is necessary for the yeast to feed on as it activates and allows the dough to rise.
Milk is scalded in this recipe which means it is heated just below boiling. I use an instant-read thermometer but if you don’t have one, heat the milk just until small bubbles form along the sides of the pot. As soon as you see small bubbles on the side, remove it from the heat. Scalding the milk helps the bread rise better as it denatures some of the proteins. To scald the milk, heat it to 181°F and then allow it to cool to about 110°F before using.

How to Make White Bread
- Proof the yeast by mixing it with sugar and water per recipe directions below. Let it rest 10 minutes.
- Heat the milk to just below boiling (per the notes in the recipe) and allow it to cool slightly.
- Combine remaining ingredients except for flour in a bowl. Add some of the flour, the milk and the yeast mixture.
- Gradually add the rest of the flour to make a dough. Knead the dough & let it rise until it’s doubled in size.

- Punch down the dough, roll & shape it, then let it rise in the loaf pans.
- Bake until the tops are browned.
PRO TIP: Get that pro baker look by brushing the top of the loaf with a whisked egg or milk before putting it in the oven.

Tips for Perfectly Baked Bread
- Always gather utensils and prepare pans before starting to bake bread in order to use the water and milk at their necessary temperatures.
- Kitchen thermometers are the best way to determine the proper temperature of the water and milk before mixing.
- Let the bread cool in the pans until warm to the touch before removing. Remove from the pan and cool completely on a wire rack. If cooled in the pans the bread will form moisture in the pan.

Best Way to Store Bread
Keep homemade white bread like any other bread, either at room temperature or in the refrigerator in a sealed plastic bag or container. It will last about 4 days at room temperature and about 6 days in the refrigerator. Freeze whole cooled loaves or slices by wrapping them in plastic and then placing them in zippered bags with the date labeled on the outside for up to 6 months.
PRO TIP: Homemade white bread does not contain commercial colors, dyes, or preservatives, so it has a shorter shelf life. Keep it in the refrigerator for a longer-lasting loaf.
Best Ways to Enjoy White Bread
Did you make this White Bread? Leave us a rating and a comment below!
Homemade White Bread
Fresh & fluffy homemade white bread is the perfect way to uplevel so many dishes!
Follow Spend with Pennies on Pinterest
-
Combine yeast, warm water, and 1 teaspoon of sugar together. Rest 10 minutes until foamy*.
-
In a large bowl combine cooled scalded milk (see notes), remaining sugar, salt, and butter.
-
Add 2 cups of flour to the milk mixture. Add the yeast mixture and mix well.
-
Continue adding flour to the mixture while stirring to make a dough that holds together and isn’t sticky. You will need between 6 and 6 ½ cups of flour total.
-
Place the dough on a lightly floured counter and knead until smooth and elastic, about 10 minutes.
-
Place the dough in a lightly greased bowl and lightly cover with plastic wrap. Cover with a towel and let rise in a warm place until doubled in size, about 60-70 minutes.
-
Punch the dough down and turn onto a cutting board. Divide the dough in half gently pat the dough into a rectangle about 8×12 inches. Roll the rectangle into an 8-inch log.
-
Place the dough seam side down into 2 greased (or parchment lined) 8×4 loaf pans. Let rise about 30-40 minutes until doubled (about 1 inch over the top of the loaf pan). Preheat the oven to 400°F while the dough is rising.
-
Bake bread for 25-30 minutes or until browned.
Scalding milk means it is heated just below boiling. I use an instant-read thermometer but if you don’t have one, heat the milk just until small bubbles form along the sides of the pot. As soon as you see small bubbles on the side, remove it from the heat. Scalding the milk helps the bread rise better as it denatures some of the proteins. To scald the milk, heat it to 181°F and then allow it to cool to about 105-110°F.
You can skip the scalding step but it does give a slightly better rise (and warm milk also helps reduce the rise time).
Nutrition information per slice is based on 12 slices per loaf.
The dough can be kneaded with a dough hook in a mixture for 3-4 minutes.
Keep bread at room temperature or in the fridge in a sealed plastic bag or container for up to 4 days. Freeze loaves or slices by wrapping them in plastic and then placing them in zippered bags for up to 6 months.
Calories: 135, Carbohydrates: 26g, Protein: 4g, Fat: 1g, Saturated Fat: 1g, Polyunsaturated Fat: 1g, Monounsaturated Fat: 1g, Trans Fat: 1g, Cholesterol: 3mg, Sodium: 212mg, Potassium: 66mg, Fiber: 1g, Sugar: 2g, Vitamin A: 68IU, Vitamin C: 1mg, Calcium: 30mg, Iron: 1mg
(Nutrition information provided is an estimate and will vary based on cooking methods and brands of ingredients used.)
Course Bread
Cuisine American


[ad_2]
Source link